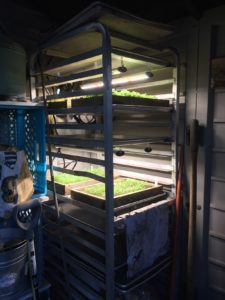
Lately I’ve been working on supplementing our rooftop garden’s produce with an indoor, year-round growing system. I’m experimenting on lots of different crops, grown in a half baking sheet (18″x13″) and housed in, no surprise, a baker’s proofing rack, fitted with LED grow lights.
The new baker’s-proofing-rack greens system at the Rot.
Because the sheets are only 1″ deep, I’ve added a wooden border from some old cedar fence boards I had lying around, ripping them down to 2 and 1/2″ high and basically creating an 11″x 17″ rectangle that nests inside the tray and allows the whole unite to just barely slide into the rack system.
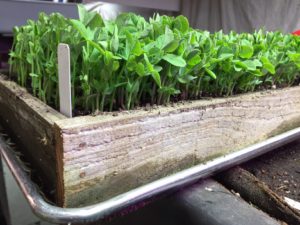
With this 2 and 1/2″ inches of soil, I have been planting peas, among other things, and I must say this system is ideally suited to their production….as shoots, that is.
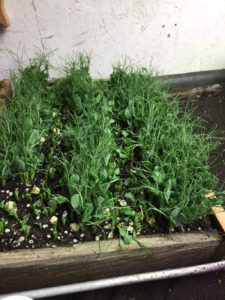
Here are the shoots in all their splendor, and notice the handsome (old fence board!) sides, ripped to 2 and 1/2 inches, which allows a pretty good quantity of soil, while still allowing the tray to slide into the rack.
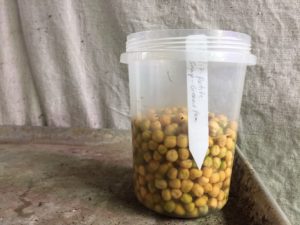
Since light is expensive, I try to minimize the time they spend under it, so I hasten their sprouting by soaking the seeds overnight, then rinsing them a few times the next day.
Not much to the sprouting process. Just soak them overnight, pour off the water the next morning, and then start rinsing them with fresh water two times a day until they sprout. I stuck in a label from the get-go because I have a number of varieties all at different stages, so I wanted to minimize confusion. Sprouting also works for outdoor planting. See my earlier post “Pre-sprout Pea Shout Out”: http://www.urban-ag-solutions.com/pre-sprout-pea-shout-out/
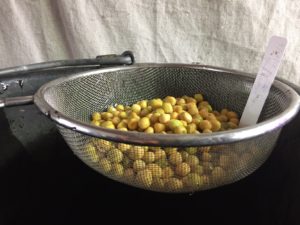
I presprout a lot of seeds, so I have a strainer dedicated to the task in the seed room. Twice a day dump the pea seeds from your container into the strainer, pour fresh water over them, then dump them back into the container. Pretty hard stuff, right?
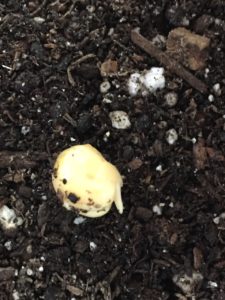
By day two they should be showing what looks like a pig’s tail (sans curl), which is really the proto-root or radicle. I don’t wait too long once I see this because that root is growing hourly, and once it gets to be an inch or so, it becomes fragile and easy to snap.
When you see that little radicle emerge, it’s time to stop sprouting and start planting in the tray. The longer the radicle, the greater the risk of snapping it when you move the seeds from sprouting container to tray. Ouch!
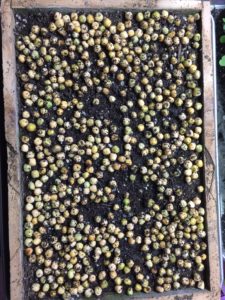
I have found that about 5 oz of dried peas (I have a little digital platform scale to determine this) soaks up to be just enough to carpet-cover the surface of my planting tray. Spacing the peas more or less evenly with a a few shuffles of my hand, I give them a light covering of more potting soil, water, and then put them under lights. They will be up in a day or two at most if you presprout as I do.
Here’s how thickly I sow the seeds, insuring a verdant carpet of shoots in a week’s time.
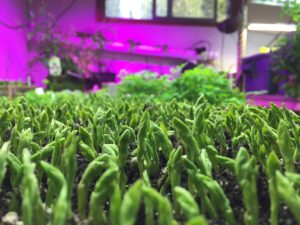
Once emerged, they virtually sprint to cut-able shoot stage. In my experience in the garden, peas don’t mind crowding in the row, and, as far as shoot production goes, they certainly tolerate it in the growing tray. Plus a thick planting makes a lovely massing effect, and I cannot help but anthropomorphize as I see in them a crowd of anxious, eager souls, waiting for direction. While you are observing yours emerge, wax poetic a bit and see what qualities you project on to them.
They’re up and looking around. What a charming little crowd!
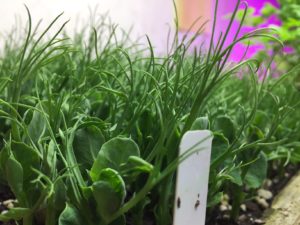
While we are waiting and watching, it’s a good time to discuss seed sources and varieties for sprouting. Desirable characteristics include tenderness of stem (since we aren’t planning on keeping them around long enough to check out the other parts like flowers and pods!), and interest in leaf form, and here recall that tendrils (the curly “fingers” that allow peas to climb) are modified leaves. Dwarf Grey Sugar, which is promoted in catalogs mainly for its flowers, does indeed grow some leafy, tender shoots that are just full of verdant, pea goodness. Feisty, a variety bred for its tendrils, comes up immediately ready to eye-wow, with a mop of curly hair (tendrils) on top reaching for the sky. Johnny’s Selected Seeds (http://www.johnnyseeds.com/), of Albion, Maine, has the best selection of varieties specifically intended for harvest as juniors.
Here is Feisty, a lovely, tender, sweet, and tendrilly pea.
Then, just a brief ten days after sowing, comes harvest. It couldn’t be easier, or should I say peasier? Just bring some scissors and a container to your growing area, grab a bunch, snip the bases a little above the soil level, and that’s it. They are usually quite clean, especially if you bottom-water your trays, but no harm done in passing a little water over them before eating to dislodge that stray soil particle. No sense getting a bit of grit in the mouth to detract from those tender shoots.
For the first harvest from the tray, I snip rows out of the middle to allow the remaining peas more root room for further growth. Probably doesn’t matter that much, though, because I’ll be harvesting the rest before long anyway.
And how to eat? Well, raw immediately recommends itself, both because of the ease (which rhymes with peas, right?) and because of the nutrition. See this post from a naturopath/nutritionist to get the lowdown on pea shoots, including recipes: http://markitonutrition.com/pea-shoots/
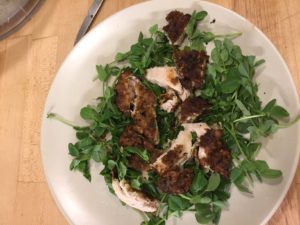
Obviously, adding them to salads is a no-brainer, and I have enjoyed making beds with them for various entrees. When the entree is recently cooked, like a breaded chicken breast, it lightly steams and cooks the shoots as it rests on them, turning them even more vibrantly green and additionally softening them.
This herb-breaded chicken breast that I cooked the other night was the perfect thing to sit atop a bed of Dwarf Gray Sugar pea shoots. The chicken lightly steamed the shoots as it rested there, and I had entree and salad in each bite.
I confess that before this year I had almost no relation with or feelings for pea shoots, but now I am starting to see them as indispensible (maybe that’s self-serving since I am growing so many right now). They are delicious, nutritious, cute, and ever so easy. Try sprouting and growing some shoots, and in 10 days you’ll see what I mean.

